Chapter 16: Polish Your Code And Submit Your PR
In the previous chapters we saw how to create a fully functional business application. Now we will prepare our code to be shared and learn how to share it.
Coding guidelines
We will start refactoring the code to match to the Odoo coding guidelines. The guidelines aim to improve the quality of the Odoo Apps code.
Reference: you will find the Odoo coding guidelines in Coding Guidelines.
Exercise
Polish your code.
Refactor your code to respect the coding guidelines. Don’t forget to respect the module structure, the variable names, the method name convention, the model attribute order and the xml ids.
Your first Pull Request (PR)
The following is intended to be used by Odoo staff members only. All repositories mentioned are not accessible for third-parties.
Now that your code respects the Odoo code guidelines and is polished up, let’s share it with others.
Configure development repository
We will start by creating a git development environment for the ’custom’ folder, like we did in the
beginning for ’odoo’ and ’enterprise’. The PR will target the odoo/technical-training-sandbox repository.
To do this the first step is to fork in GitHub this repository to create your own development repository.
After you successfully created your development repository, we will configure your existing $HOME/src/custom
folder to be able to commit your work.
$ cd $HOME/src/custom
$ git init
$ git remote add training git@github.com:odoo/technical-training-sandbox.git
$ git remote add training-dev git@github.com:xyz-odoo/technical-training-sandbox.git #Don't forget to change xyz-odoo to your own GitHub account
$ git remote set-url --push training no_push #Avoid pushing directly into the main repository
$ git fetch training master
$ git branch master training/master
$ git checkout master #Two new files will be downloaded README.md and .gitignore
Note that if your work is already in a Git and GitHub configured folder the previous steps are not needed. This is the case when you start working in the ’odoo’ or ’enterprise’ folders.
Branch, Commit & Push
Before creating the PR, a new working branch has to be created and used to commit the code. Afterwards the branch will be pushed to the development repository.
Create your working branch:
$ git checkout -b master-my_first_branch-xyz
Your branch name must follow the following name structure : <targetVersion>-<feature>-<trigram>
Example: The branch master-sale-fixes-abc on odoo-dev/odoo is a branch containing fixes for the sales app in the odoo/odoo repository, to be deployed in master and done by ABC.
Commit your code:
$ git add .
$ git commit
Everyone reads your commit messages!
The commit message is very important, follow the Git guidelines.
Push your new branch to your development repository:
$ git push -u training-dev master-my_first_branch-xyz
Varoitus
NEVER use git push --force (or git push -f) with a branch that does not belong to you
or in a stable branch. Never, never, never!
Vihje
Remember that you can use git status at any point to check the current status of your branch
Vihje
You can create git aliases to shorten some of these commands. Ask your colleagues if they use git aliases and get inspired by their work.
Create your first PR
After pushing your branch to your development repository you will see an output similar to:
Enumerating objects: 24, done.
Counting objects: 100% (24/24), done.
Compressing objects: 100% (20/20), done.
Writing objects: 100% (23/23), 6.67 KiB | 525.00 KiB/s, done.
Total 23 (delta 1), reused 0 (delta 0)
remote: Resolving deltas: 100% (1/1), done.
remote:
remote: Create a pull request for 'master-my_first_branch-xyz' on GitHub by visiting:
remote:      https://github.com/xyz-odoo/technical-training-sandbox/pull/new/master-my_first_branch-xyz
remote:
To github.com:xyz-odoo/technical-training-sandbox.git
* [new branch]      master-my_first_branch-xyz -> master-my_first_branch-xyz
Branch 'master-my_first_branch-xyz' set up to track remote branch 'master-my_first_branch-xyz' from 'training-dev'.
There are two ways to create the PR:
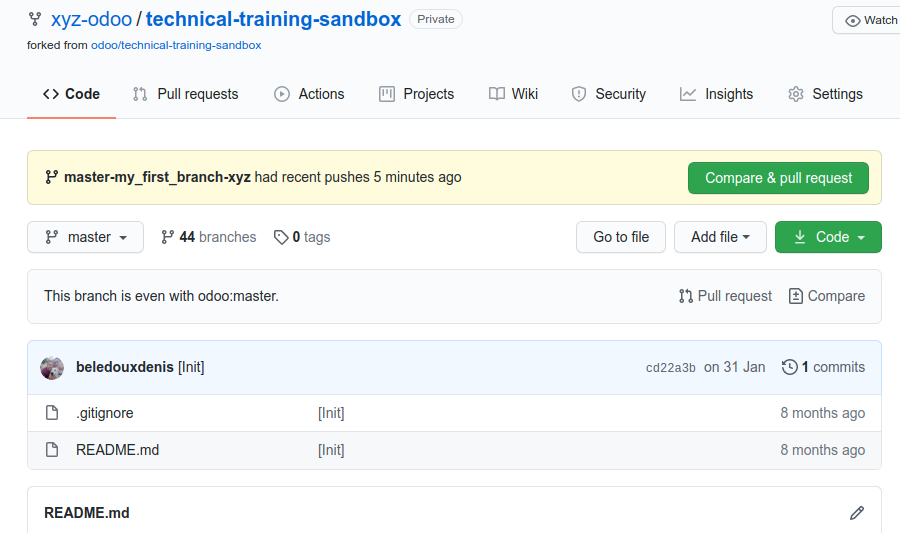
Click on the link displayed in the output of the push command.
Open a browser in your development repository
https://github.com/xyz-odoo/technical-training-sandbox. There will be a button to create a new pull request.
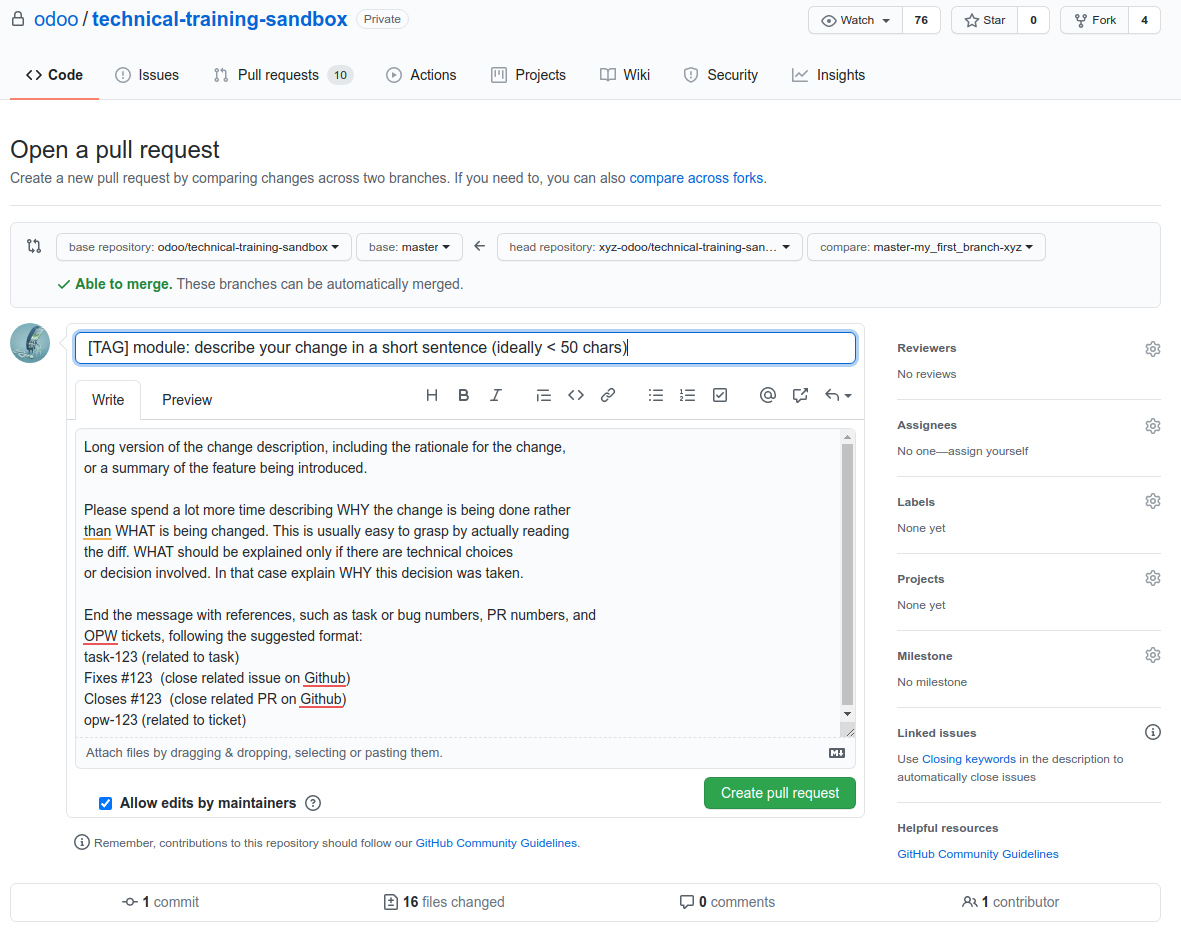
You will notice that your commit message is used as the pull request message. This occurs if you have only 1 commit. If you have multiple commits, you can either make a summary of the commits as the PR message or if there aren’t that many commits you can just copy/paste your commit messages as the PR message.

Additional Info for Odoo Staff
Now that you know the basics, here are some more useful pages if you haven’t seen them already:
Our welcome page has extra info about working at Odoo as well as additional tutorials that are both language and Odoo specific.
Once you are ready to start doing tasks, it is important to note that Odoo follows a rebasing workflow instead of merging for your PRs. This cheatsheet describes how to do this flow. If you want to become more of a rebasing master, then this tutorial is extra useful.
Test on the runbot
Odoo has its own CI server named runbot. All commits, branches and PR will be tested to avoid regressions or breaking of the stable versions. All the runs that pass the tests are deployed on their own server with demo data.
Exercise
Play with the runbot.
Feel free to go to the runbot website and open the last stable version of Odoo to check out all the available applications and functionalities.